Tuesday, September 23, 2014

Upholstery Terminology and Abbreviations

As in any other craft or trade there are a number of words or phrases that are either outside normal language or perhaps known words that convey a completely different meaning. Many technical words and terms never find their way into the ordinary dictionary and unless ready reference is available it sometimes means that interest can be lost or a wrong interpretation put on a word that means lost time in study. In this chapter I have drawn up a list of such words.

Pull Down (also called a "Stretcher Cloth"): A strip of cloth sewed to the bottom of the inside arms and inside back in areas that don't show.
Deck: the area under the seat cushions
Arc springs: zig zag springs that are in the seats and backs most modern sofas and chairs.
Tack strips: strips of cardboard or metal that have tacks embedded.

Fabric Cutting Direction
  • Railroad the fabric: this means that you are cutting from the side of the fabric. The top of the fabric is across the other side of the fabric.
  • Up the roll: the top of the fabric is up the roll. You cut all the fabric pieces with the top pointed up towards the roll of fabric.

Abbreviations:

Use these abbreviations to mark the back of the fabric pieces after they are cut.

IA  Inside Arm

OA  Outside Arm

AF  Arm Face

IB   Inside Backrest

OB  Outside Back 

IW   Inside Wing

OW  Outside Wing

FDK  Front Deck

FB    Front Band

TB    Top Band

CUSH  Cushion top and bottom

Box   Cushion Boxing

Zip   Cushion Zipper

Item Abbreviation and/or description

BORDER Bdr. Can be in front or along top of back.

FACINGS Fegs. The front of the arm-rests. Can also be on the sides of a back.

PLATFORM SEAT Pl. St. A Platform Seat is one that has a guttering and has a cushion

BLACK AND WHITE WEBBING Best English webbing with herring bone design.

Bos A projection from the back of an upholstery button. Made of cloth to enable a needle and twine to pass through.

BRIDLING A series of twine loops about six inches long which are put in canvases to carry the stuffing and keep it in position.

BUFFED The rubbing or buffing with carborundum to obviate any blemishes that may be in hides.

BUTTONING The insertion of upholstery buttons. Two methods used are `Float' Buttoning and `Deep' Buttoning. The former method leaves the button on the face of the cover, whilst the latter is pulled into the cover deeply and forms a pleated diamond.

CABRIOLE Name given to a hammer with a small driving area. Used mainly on show-wood furniture.

FLYS Pieces of hessian or any old material sewn on to the inside edges of the cover material to save material and give added strength for pulling cover into position. Known as `Pullthroughs' in U.S.A.

GAP Name used in describing the opening between the arm web and the back upright rail. Left free for passing through flys, etc., to be tacked against rail.

GAUGE Applied to the thickness of the steel wire in the manufacture of coil springs.

HOLDING TIE A stitch between the spring canvas and scrim. Keeps the first stuffing firmly in place. Also known as `Through Stitch'.

JACKETS One or more parts joined together to form a tailored finish, e.g. inside arm and facing.

LACING A term applied to the stringing together of coil springs in which a `laid' cord is used.

LININGS Pieces of old canvas tacked on to the outsides before the outside covers are put on. Gives 
extra resistance to pressure, especially needed in the case of leather covering. Not to be confused with the outside covers proper, which are known as `linings' in America.

PIPING FOOT An attachment for the sewing machine to enable piped edges to be sewn on to joins.

PULLTHROUGH Meaning the same as a FLY. An American Term.

RAILS STRETCHER A supporting rail on a settee or divan base.

TACKING The lighter rails for tacking foundations and covers to.

BASE The main foundation rail at floor level.

REBATED Where a groove is put in the edge of a rail, and the lower edge used for tacking, or where cable springing is fixed.

REGULATING The `working about' of stuffing to the required place for stitching, etc.

RIPPING OUT Procedure for stripping chairs for repair.

SCRIM STUFFING Another term for the first stuffing enclosed in scrim or hessian.

SHOW-WOOD Polished wood surrounding to stuffed or upholstered part of furniture, as with a dining-chair or occasional chair.

SKIVING The art of chamfering a piece of hide in order to join together two pieces by gluing.

SPRING EDGE Mostly applies to the front edge of chairs, but also to all edges where an independent springing is adopted.

SPRING INTERIOR The inside springing of a cushion or mattress.

SPRING UNIT A collection of springs to form foundations for seats, arms and backs. Wired and clipped together.

STITCHING The stitching by twine of edges and rolls to form a shape to stuffing.

STRAPS Metal bands or webs upon which spring units are mounted and fixed to the frame by clout nails.

TACK DRAWS The `shadowed' furrow caused by the strain of a tack. Particularly on silk covers.

TEMPORARY TACKS Tacks only half driven in. Easily removed.

TENSILE Applies to rubber webbing or cable-springing.

THUMBROLL An alternative to a stitched edge. Known as a cordroll by the American upholsterer.

TUFTING Carried out on mattresses. Same procedure as in buttoning.

WIRE KNOTS The finish of the metal coil on a spring.


These represent the majority of terms used in the upholstery trade. Once again T must point out that this book is dealing purely with the part of the trade known as the `Stuffers'. The soft furnishing and carpet departments also have their own particular terminology.
Special Terminology
Perhaps a recapitulation of the names and abbreviations of the cover pieces of an average chair or suite would be as well to start off such a chapter. These names I shall keep together in a group regardless of alphabetical order. Most are self-explanatory.

By: Search Google

Monday, September 22, 2014

Upholstery Tools And Workshop Requirements

Compared with other trades like cabinet-making, plumbing, etc., the upholstery trade requires few tools.

Hammers


Perhaps the most important one is the upholsterer's hammer. Upholstery hammers are specially made for this specific craft. There are three types, the favourite one
(a) Ringed shaft upholsterers hammer (b) Head of cabriole (c) Pear shaped shaft
being that with the round ringed shaft. This is the better designed and balanced hammer and has a hardened steel tipped driving face. Another type has a pear-shaped handle and a more square-cut steel head. Both these are known as tack hammers. The remaining pattern is called a `cabriole' hammer, the main difference being a much smaller driving surface-about a quarter of an inch in diameter, whereas the average tack hammer is about five-eighths of an inch.
The `cabriole' is used mainly for 'show-wood' furniture where great care is needed when tacking, not to bruise or damage the surrounding woodwork. Hence the reason for the small head of the hammer. It is also used for `gimping', the fixing of a finished braid or gimp by the use of gimp pins.

Cutting tools

These consist of scissors and knives, the former should be about nine or ten inches in length and of good quality. A first-class pair of scissors will last an upholsterer all his working life. Here again we have a choice of design. One type has a square end finish to one of its blades and the other type has a pointed end to both blades. The lastmentioned are particularly useful when cutting loose covers and usually are a little dearer to buy. A knife is an essential tool for `trimming off' after the cover has been tacked on-particularly for hide and leathercloths. What kind of a knife doesn't matter, as long as it has a good sharp edge-any straight bladed knife made of good steel. Sharpen when necessary on an emery paper or whetstone.

Web strainers

The thing that puzzles nearly every amateur upholsterer is how to stretch the webbing tight. This is done by a web strainer or stretcher. There are one or two different types of these.
All are made of hardwood, the simplest being a piece of wood with a groove at one end which fits over the edge of the frame being webbed. The webbing is brought over the top and under the grooved end which is placed against the frame. With a firm handgrip it is levered downwards until the required tautness is reached. Another version, mostly used in America, is the one that has four or five spikes in the levering end. This does away with having to pass the webbing under the grooved end, but it can damage and weaken the webbing. The type of strainer that has the slot in the main body of the wood and a piece of dowelling or rod attached is one of the most popular. With the handle upright the webbing is passed double through the slot to form a loop. Through this loop is placed the dowelling or rod to hold it and the strain is applied in the same way. The last version is known as the lever-type strainer. This is a quick and easy method of web stretching. The webbing is passed over the lever and allowed to hang, the leverage is then taken up in the same way with the rebated end against the frame side and a downward pressure. Another form of stretcher is the web or hide pincers. This tool, made like pincers, has wide serrated jaws and is useful for straining short ends of webbing or hides.

Ripping-out tools

These consist of an upholsterer's ripping chisel and a wooden mallet and are used to prepare the frame for a repair. The chisel end is placed against the tack and given
one or two blows to remove same; always with the grain of the wood, otherwise you may crack or chip the woodwork. A `wood rasp' is for rounding off corners of the frame where an `edge' has to be tacked. Screwdrivers, pincers, and a bradawl complete the general tool layout.

Upholsterers' needles and stitching tools

These are essential requirements. They consist of mattress or stitching needles and are from 8 to 16 in. in length. They have double-pointed ends with an eye about an inch from one end and are round in section. An exception is the one that is shaped triangularly for about a third of its length. This is called a bayonet point. It is most useful for stitching built-up stuffed edges as the bayonet point is stout enough to use as a regulator-a `regulator' being the tool used for trimming or regulating the stuffing to the required place beneath its hessian covering. It is an extra-thick needle-like tool with a point at one end and the other ends played out flat to help leverage against the side of the palm when using it. Another tool for adjusting stuffing is the stuffing iron. This is a metal tool with a fork-like end and mainly used in America.

A `packing' or `spring' needle and a half-circular needle will complete the stitching tools, a further addition being three or four dozen steel skewers. These are used to hold hessian or covers in position until they are stitched.

Machinery required for the workshop includes a heavyduty sewing machine and a carding machine. The latter is used for `teasing' and cleaning various stuffings from repair jobs. A cushion-filling machine is needed if a large volume of this work is done. Factory machines usually include mattress-making machines and a loose-seat machine, a fairly recent innovation
.
A linen tack bag with three or four sections is required to hold the different sizes of tacks, and an upholsterer's apron which has a capacious front pocket. This pocket is invaluable to the `ragtacker'. Tacks are held in the mouth and it is quite a shock when one first sees a handful of tin tacks thrown into the mouth. They are brought to the lips by teeth and tongue and taken by the thumb and forefinger of the hammer hand, still holding the hammer. Experience has proved that this is the fastest and most suitable method. The advent of the hammer with the magnetic head prompted some to alter their technique by placing the hammer head to the lips and carrying the tack to the job direct.

 Whilst talking of tacks it is interesting to note that in most workshops they are cleaned before use. This is one of the first jobs the apprentice is required to do thoroughly. A canvas bag is made about 2 ft. long and 6 in. wide. The sewn-up end is tacked against the wall somewhere about waist height. The tacks are put into the bag and then, gripping the open end in his fist to keep them from falling out, the boy shakes the bag to and fro for approximately ten minutes, very much in the same way that the ostler cleans harness parts. A good cleaning will bring the tacks out bright and free from rust. Telling the apprentice to sharpen the points was one of those old gags that every workshop played on its beginners.


There is a combination that is essential for each man in the workshop. This is a pair of trestles and a bench. The trestles are of the usual variety but with a beading round the top. This to prevent pieces of furniture with castors fixed from moving off. The bench is usually about 4 ft. square and is placed on the trestle tops for doing loose seats or cutting out, etc. The old-type Gladstone bag was a favourite for carrying the tools in, and a hair cushion tacked upon the wall near the bench took care of the needles and regulator. A tape measure is often found draped around this cushion ready to hand when needed.

By:www.oldandsold.com

Sunday, September 21, 2014

Recovery -vs- Reupholstery -vs- Restoration?

Reupholstering Antiques

When you are considering having a antique reupholstered, there are a number of factors that need to be considered. What is most important to you? Preserving the frame, restoring to original, just making it usable, keeping the cost down, etc.?
 

Recovery -vs- Reupholstery -vs- Restoration?

Some people who bring in antiques to recover just want the cover changed, they say everything else (under the cover) is just fine. To be blunt, they don't really know what the insides look like. In addition to that, the average person doesn't really look at their furniture. It's often been with them for many years and they just (want to) assume that everything under the cover "is OK". Quite often, by the time that the furniture is brought to us it has already been recovered perhaps several times. Each time before the client may have told the previous upholsterers, "Just put a new cover on it, everything else is "just fine". However, the padding and fabric tend to hide the true condition of the springs and padding to the client. Over the years the fabric, padding, support linings, springs, and webbing have been slowly aging.
As an example look at this antique. From the outside everything looks OK. When we take the cover off we can see that the burlap and webbing is severely deteriorating.
Here are some general guidelines to go by.
  1. When you are going to the expense of having something recovered, it would generally be safe to assume that you want the springs and padding to last the lifetime of the cover. Generally you want the cover to wear out before the stuff under it.
  2. Unless the furniture was reupholstered very recently - AND - the springs and padding were replaced or thoroughly repaired at that time, then we would recommend that they be repaired or replaced now. Look through the Picture and Slideshow section of our website and you will see that the support structure (webbing and burlap) of many of the antiques are quite deteriorated, even when they look fine on the outside.
  3. Recovering (just putting a new cover over the existing springs and padding), is only an option if the frame is rock solid, if the springs and padding are in excellent shape. If the frame is even a little wobbly, or the springs are weak, then you would at least go for the reupholstery option.

Especially with antiques there is often much more work under the cover than what you can see on top.

What is your Purpose?

Restore for historical value?
Make usable for household use?
Here are some questions to consider:
  1. If you have an antique, should you go through all the time and expense of restoring* it, or do you just want to make it usable for your household?
  2. What is the furniture worth?
  3. It a rare piece? Would it be valuable it restored? Or it is it just a common antique? Where can you find out?
  4. What is the history of the piece? Does this particular piece of furniture (or this style) have any specific historical value?
  5. If it is a valuable piece, would it make sense to lessen it's value by just doing one of the lessor cost alternatives?
  6. OR - If it is just a common antique, would it make sense to go through the added expense of restoring it? Would the additional cost be worth it?

What Condition is the Furniture in?

Much of the time when clients ask us about recovering their antiques, they see their furniture in their minds as it was quite a few years ago. They see their furniture as they “want to see it”, not as it truly is today. The sofa or chair may have a fabric that is in relatively good shape where a previous upholsterer just covered over the previous upholstery. So those customers often say, “I just want it recovered. The rest of the chair is in good shape." However, the question is, have you actually thoroughly inspected your furniture? Have you tried to wiggle all the joints of the legs, arms and backrest?
Once we get the cover off, and open up the padding, then you can begin to see the true condition of the sofa or chair. When you have an antique estimated, you must have the awareness that it will cost you more than you think. It probably needs more work than you expect.
When determining how much work needs to be done, we go by the condition of the frame, springs, support linings, and the padding. We will not cover over the internal workings of a chair that is falling apart.
How can you tell what the true condition of your furniture is?
  1. First and foremost, pretend like you don’t own the furniture (or have someone else inspect it) and are inspecting it to see if you want to purchase it. Look it over very critically. Your job is to find everything wrong with it that you can. (Much of the time when client’s inspect their own furniture , they look at it through rose-colored-glasses. They don’t want to see anything wrong with it.)
  2. Firmly hold onto and wiggle all the major areas of the furniture (arms , back, legs, etc). Are the joints rock-solid, or do the the joints wiggle?
  3. Look under the furniture. Is the webbing still tight, or does the webbing bulge down quite a bit?
  4. When you sit on the furniture, does the seat give you good solid support. As you press down firmly all around the top of the seat, is it all firm, flat, and level, or are uneven or hollow spots.
  5. How long has it been since the chair has been reupholstered.
  6. At the time that it was done, were the springs reties, were the support linings replaced?
  7. If it has been more than possibly 15-20  years since the insides have been rebuilt, then there is a good chance the chair or sofa will need much work.

Upholstery Cost is Higher

Reupholstering antiques usual cost more than upholstering modern furniture because:
  1. The frames on antiques have had much more use and have been around longer than modern furniture. Unless the frames have been reglued lately, they may need to be glued. The frames are usually more brittle and we often have to reglue frame pieces that are loose and are coming off.
  2. The springs and padding usually need attention or repair.
  3. Antiques usually have wood around the edges and bottom of the furniture. The means:
    1. we have to work slower and be much more careful when tearing off the old cover and putting the new cover back on.
    2. Attaching fabric around the decorative wood involved extra work of attaching the fabric and then having to apply the trim over the fabric edges.
I've heard many times, when someone wants to have a antique recovered, "I only want the cover changed. Everything else is in good shape." The truth is that no one can see what the frame and springs look like under the cover. The fabric and padding hide the true condition of the frame. A high percentage of the time, when "recovering" antiques, I end up having to strip the furniture to the frame, removing the burlap, webbing, padding, and springs, then having to rebuild everything from the frame up. Sometimes I also have to take the frame apart and reglue it.

What is your Budget?

This will greatly influence your reupholstery options. If you are on a tight budget, then I would suggest that you either put the furniture away until you can afford to have it done right, or, perhaps sell the furniture, or give it to another family member, who can afford to have it done.

Things To Consider About Your Antique(s)

Although you see your antique as a single piece of furniture, it is actually composed of numerous elements. In reupholstery you need to consider each part.

The Frame

Structural: Are all the joints of the frame solid, or are some joint loose or squeeky? To check, go over the furniture and try to wiggle every frame part. the frame Regluing and reblocking the frame as needed. Sometimes this might completely disassembling the frame and regluing, adding new blocks (as needed) to the corners.

Finish:

Cleaning: Over a period of years dirt, grime, and wax may have built up on the woodwork of your antique.
Restoration: Assuming that the old finish is salvageable, leaving the old finish on and cleaning and restoring as possible. stripping off the old finish could lessen the value of the furniture.
Refinishing: stripping old finish off, staining as necessary, adding a new finish of your choice

Springs:

Type and condition of existing springs. Are the old springs in good shape; are they reusable or do they need to be replaced? Many of the antiques used the common hand tied springs, which are still being made today. Some antiques used unusual springs that are no longer being made. In this case, a decision has to be made to repair the existing springs (which usually costs more), or to replace the springs with another type of springs, or to remove the springs and use webbing and padding.
Here are some spring choices
  1. Use As Is: If the springs are in good condition, just covering over them might be a choice. But in most cases this would not be recommended.
  2. Re-Use Springs: reusing existing springs (replace any broken springs)
  3. New Springs: replace All springs with new springs

Padding:

Type and condition of padding. Is the padding in good shape; can it be reused? -or- does it all need to be replaced? Do you want the same original type of padding, or do you want to replace it with modern materials.

Type of Materials originally used in antiques : Horsehair, tree moss, dried grass, cotton, excelsior, wood shavings.

Cost of materials: In the old days when the furniture was originally made, upholsterers and furniture builders probably used whatever type of materials and padding that was common and easily obtainable. Over the years since then, methods and materials have changed drastically. That which was once common place is often now rare and hard to find, and therefore expensive.

Labor for installing materials: Many of the materials used in antiques require very labor intensive methods of attaching them to the support materials. For example: horsehair

Modern materials, such as foam, requires very little extra labor to attach it to the burlap.

Padding Methods:

When having antiques recovered, many clients may not care what type of padding is used in the reupholstery process. For those clients that are concerned about the padding used, here are some padding choices to consider.
*Padding Note: a. When working with antiques, rebuilding the padding using the original methods and materials can be more expensive than the rest of the reupholstering process. b. The original methods, while common to the time period, were very labor intensive. Similarly, while the original padding materials were common to the time, nowadays, many of those materials aren't as common or as readily available today, so they very expensive as compared to today's padding materials.

Re-use existing Materials:

With any of these options, new padding is added over the top of existing padding if or as needed.
  1. Leave Existing Padding in Place: Assuming that the furniture has been reupholstered recently (with new burlap and new webbing), leave all padding in place, as much as possible, and put the new cover over the top of the existing padding
  2. Re-use Existing Padding & Add New Supports: Carefully remove the padding materials (cotton, hair, dried grass, excelsior, moss, etc.) off the furniture, as needed, and replace the existing supporting materials (webbing, burlap, etc.). Then re-attach existing padding materials and handworked areas mostly undisturbed to the frame. Add new outer-linings as needed to hold the padding in place. Add new padding on top as needed. (This is our most common option)
  3. Refresh Padding: same as 2. above, except old padding is removed, taken apart, fluffed up, and restitched, as necessary, in place. New interlinings added as necessary. 

All New Padding:

As in 2 & 3 above, the supporting materials are all replaced with new. In addition the padding is also replaced with new padding, with one of these options:
  1. Common Modern Padding: Padding replaced with new common materials, such as polyfoam, cotton, and other readily available materials
  2. Common Antique Padding: Padding materials are replaced with padding materials that are commonly used in antiques. This may be the same, or different materials that are currently in your furniture. This choice will be determined by what type of padding materials are in your furniture compared to what type of padding materials are readily available to us from our suppliers. 
  3. Same or Similar Padding as Original: As much as possible, padding materials are replaced with the same type or similar to the existing padding materials.

Attachment: Methods and Materials

Tacks: Most of the fabrics on antiques were commonly fastened onto the frame with upholstery tacks and Upholstery Tacksa tack hammer. Some of the drawbacks about using tacks is they  damage the frame. Upholstery tacks are, in a small way, shaped like the splitting wedges that are used in splitting  wood. When the furniture was new, and had just one cover put on, and splitting damage wasn't noticable. But, when the furniture has been recovered numerous times using tack, this results in many tack holes in the same area. This can result in the wood in that are begin to have tiny splits in numerous areas where the tacks have been. Over the many  years I've done upholstery I've seen a few furniture pieces where the wood had been damaged so badly by tacks that that wood had to be repair or replaced before it could be upholsterered. The frames of antiques can become very dry (the result of many years in a warm house) and are very susceptible to splitting, especially with furniture that has been covered many times using tacks.

Nowadays, with the coming of the staple guns, fewer and fewer upholsters use tacks very much.
Staples: most upholsterers and furniture manufacturers attach the upholstery fabric to the frames using Staples & Tacksstaples. This is a very easy and cost effective method. 
There several types of staples. The type that many upolsterers use, including me, is like at very thin wire, which does almost no damage as it goes into the wood.Unlike tacks, the thin legs of the staples leave the wood almost undisturbed.In the picture at the left, compare the thickness and shape of the shaft of the tack and the staple that goes into the wood. The thinner the shaft, the less damage to the furniture frame.
Cost: Unless an upholsterer is very proficient at spitting tacks, using tacks adds a significant amount of time to the upholstery process. So using staples is also a cost saving feature.
Preserving the Frame: An important point to remember that with antiques preserving the quality and stability of the frame is much more important that "how" the fabric is attached to the frame. While using tacks might be more "historically" true, using staples is less damaging to the frame.

Antique Upholstery Theories

Restoration: Restore as close to original as possible using the same types of fabrics, supplies and attaching methods as the original. (This can have various meanings depending upon the specifications of the client, the availability of materials, and the skill and knowledge level of the upholsterer. If you are considering having an antique restored, be sure to talk over specific concerns or wishes you have with the upholsterer before the price is given and the order is written.)

Reupholster Using Common Materials: Since the original makers of the furniture used the common material they could easily find, have the upholsterer likewise use the common materials that are available today.

Responsibilities

When you own and care for an antique, you are steward of a relic of the past. What are your responsibilities to the past and to those who will own the furniture in the future. The basic premise of an antique is that it had a life (of sorts) before you owned it and it will probably have a life after you.

Glossary

Restoration: There are various levels of restoration from reusing the existing materials to complete replacement. Also different upholsterers with different backgrounds and skill levels will do the job differently.
Recovering: taking the old cover off and putting a new covering on.
Reupholstering: Often used synonymously with Recovering, but in a deeper sense, can be defined as doing a more thorough job, include frame rebuilding, retying springs, adding new padding, etc.

Saturday, September 20, 2014

Finding the right fabric


Fabric Content

While this is not an all inclusive list of contents found in upholstery fabrics, these are the basics. Knowing the pros and cons of each will help you select the fabric for you.

NATURAL FIBERS

Natural fibers generally feature flat weaves that are ideal for prints. They are softer, and tailor well for upholstered furniture. However, being a natural product they can fade in direct sunlight, and may be susceptible to pilling.
  • Cotton. Made from the cotton plant, this is soft, absorbent, and fades easily.
  • Linen. Made from the flax plant, linens tend to have a lot of hard plant fibers and slubs.
  • Wool. Made from animal hair, wool is warm, and not often used in upholstery.
  • Silk. Made from the cocoons of silk worms, silk has strong fibers and a natural shine, but can be damaged by sunlight.
  • Rayon. Also known as viscose, rayon is made from wood pulp and designed to be shiny like silk.

SYNTHETIC FIBERS

Synthetic fibers are made by extruding chemicals into fiber strands. They are more durable and (in general) more resistant to staining and fading than natural fibers. Synthetic fibers are just as likely to be susceptible to pilling, however.
  • Acrylic. Very durable and often has a texture similar to wool.
  • Polyester. Very durable and cleanable.
  • Nylon. Stain resistant and durable.
  • Olefin. Durable, but can be susceptible to pilling if used in high amounts.
  • Polypropylene. Related to polyester.

Fabric Types

There are several different ways to turn yarn into fabric.
  • Woven. Most fabrics are woven together on a loom. Some looms can create very intricate designs using multiple colors of yarn, like the Jacquard loom. There are also other looms, like the Dobby, that make simpler designs.
  • Knit. Not many upholstery fabrics are knit (like a sweater), but sometimes fabrics are adhered to a knit backing for stability.
  • Velvet. Velvets are actually created on a loom by weaving two pieces of fabric face-to-face and then cutting them apart. This creates that luxuriously soft hand.
  • Non-woven. Some fabrics (like microsuedes) are not actually woven. The micro-denier (really thin) fibers are bonded together in an irregular "tangle" of fibers (like felt). Sometimes they are then adhered to a knit backing for stability.
  • Print. An easy way to create any kind of design is to print it onto the surface of a pre-woven fabric. Prints are usually less expensive, but the designers are no longer limited by the looms, so they can work with some amazing colors and patterns. Unfortunately, prints are more susceptible to fading because the dyes are only on the surface of the fabric.

Pattern Types

There are a great many types of patterns in upholstery fabrics, but here are some of the more common terms.
Pattern types
Examples from left to right: floral, stripe, chair pattern, and a body cloth
  • Body cloths are solid colors or textures generally used on the body of a sofa or sectional.
  • Florals are patterns with flowers or leaves, usually done at a relatively large scale. Sometimes these are also called Jacquards.
  • Paisleys are tear-drop shaped patterns and tend to be relativel ornate designs.
  • Geometics heavily feature squares, circles, patchwork, and so on.
  • Stripes include pinstripes, awnings, ombres, herringbones, and can be balanced or unbalanced.
  • Plaids include checks, ginghams, windowpanes, and hound's tooth.
  • Frames feature mirrored patterns like damasks.
  • Chair patterns may include diamonds, ditsy dots, or other patterns, and are in a relatively smaller scale.
  • Novelties are unusual designs such as animal skins or highly decorative designs.
  • Ethnic patterns include suzani or ikat patterns.
  • Prints are anything printed on top of a woven fabric. These designs can be extremely complex because they are not limited to a loom, but they can also be more suscpetible to fading as the design is not worked into the fabric itself but is only on the surface.

Quality Testing for Fabric

If you've bought fabric upholstery before, you know that the fabric is often the first thing to show signs of wear and age. Most likely, the quality and longevity of the fabric is just as important to you as the construction of the furniture itself.
Fortunately there are a number of industry standard tests that a furniture manufacturer can use to ensure that the fabrics they put on their furniture will last. At Smith Brothers, we use each of the following tests before we introduce any new fabric—though we impose much stricter threshholds than most manufacturers would allow when we determine whether a fabric passes these tests.
  • The Wyzenbeek Test. This test rubs either a screen or a piece of cotton against a fabric in a "double rub" motion. The more double rubs the fabric can withstand without yarns breaking, the more durable it is.
  • The Pilling Test. This test rubs a fabric in a circular motion, mimicking normal wear. We then give it a rating based on the amount of pilling or fuzzing that appears after the test is complete.
                                                
  • Dynamic Seam Fatigue Test. This test stresses a seam sewn between two pieces of the same fabric. If the seam fails too quickly, we reinforce the seams on that particular fabric while upholstering.
                                               

Should I hire an upholstery professional for my furniture?

Many people have no idea of the costs or benefits in reupholstering a piece of furniture. There are a few factors to consider before deciding if you should invest your money into having this type of service.

First, decide the quality of your piece. A lot of furniture made today is not as well made as it was years ago. If you have a well-built piece, chances are that it's probably worth investing in.

Second, do you like the way the piece "fits" in your room? If you have a small room and your sofa or chairs are just the right size, it may be difficult to replace them with the right fit.

Finally, if you are considering replacing your furniture, are you able to find the perfect fabric that compliments your decor?

A lot of consumers are unaware of what can actually be done with their existing furniture. If the company you hire consists of skilled professionals, they should be able to build, reconstruct and even alter the design of your piece, giving it a new updated look.

Sometimes all that's needed for a droopy seat cushion is some new foam, which is a small fraction of the price of buying new. These are all options that can be discussed with your upholstery professional.

Finding the perfect fabric can be challenging, but if you bring something (like a pillow or arm cap) with you, along with the colors you are trying to match, you can save a lot of time second guessing your choices. In choosing fabric, make sure it is durable.

Additionally, don’t forget to ask your upholsterer what the abrasion cycle is and how to clean it. Most upholstery fabrics are “dry clean only,” but there are more out now that are washable.

If possible, always visit the upholstery shop. Make sure it is clean. Would you want your brand new fabric being applied in a not-so-clean environment? Make sure your work is being done “on site” and not being shipped somewhere else. Look at other pieces they have done and make sure the company you hire is licensed and insured. If they're covered, you're covered.

By Angies List...

www.dicarloupholstery.com

Saturday, September 13, 2014

The History of Upholstery


Upholstery is about comfort and style something humans have been remiss to live without since the time of ancient Egyptians, who used horsehair-stuffed cushions and fine fabrics draped across their daybeds and gilded thrones. It’s hard to imagine a living or family room without your favorite

comfy sofa or cushy chair, but upholstery hasn’t always been around. We will introduce you to the history of upholstery. Curl up in your
comfiest, most relaxing piece of upholstery and we will take you on a
historical tour.


The Evolution of Upholstery in Home Decor: From Tapestries to Tufts

What is now a thriving industry, and the single-most effective way to change the look and feel of an entire room, upholstery has a long and interesting history of evolving along with the home, its inhabitants, and the increasingly complicated techniques of furniture makers. 
Despite weavers fine-tuning their craft for centuries, the earliest attempts at real upholstery were little more than fabric stretched across a seat—proof that the two industries had yet to be in lockstep with one another. From hard oak seats to the tufted comfort of Victorian sofas, here’s a look at the history of upholstery.
Medieval Upholstery: Dorcers, Drapery & Tapestries

The most comfortable that a Medieval chair was going to get was the slung leather of a coffer-maker’s chair. This version demonstrates the later treatment of upholstery and cushions.
Textiles have been around as long as furniture—even longer. But not always in as perfect a union as they are today. Like any specialized industry, upholstery got its roots early with the upper classes, skills spread throughout Europe’s tradesmen, and technology and mechanization allowed it to bloom. In the 1500s, Italy established itself as a hub for fine textiles. Sumptuous velvet came from Genoa, and expensive silk from Lucca, surpassing anything else made worldwide.
The skills in Italy spread to Britain, and by 1560, weavers were busy making wall hangings, drapes for beds, and various cushions. Overall, what very early furniture and the homes they filled lacked in comfort, people could make up for with yards upholstery: cushions on hard, boarded oak chairs, with needlework done by the lady of the house; bankers, the drapery over the seat and footboard of bench-like settles; and dorcers, which hung on the stone walls that people leaned against while sitting on benches. Upholstered seats were rare until about the 17th century; even then, they were reserved for the wealthy.
The finest tapestries during Medieval times were those made by Flemish weavers, who were becoming renowned throughout Europe for their trade, a reputation that would continue to spread into the 17th century.
Tudor Gothic England: Elizabethan Domestic Comfort & the Rise of the Upholsterer

A back stool, also known as an “upholsterer’s chair.”
As standards of living were not-so-slowly on the rise, so were people’s expectations for comfort. With the end of the War of the Roses, men weren’t completely preoccupied with fortifying their homes—kind of a big deal when you imagine they lived in fear of their houses being burned down day to day, so weren’t considering putting money into how nicely furnished they were. With the money, space, and time to finally think about upgrading, a new industry flourished.
The first order of business? Using upholstery to manage drafty rooms.
In the Elizabethan era, sleeping arrangements in the home vastly improved. Enormous “bedsteads” were created—one with wood paneled head and footboards (much like beds today), and one with four posters, both of which evolved into enormous, carved structures draped entirely on all sides with heavy curtains to protect from drafts. The result was like an upholstered room within a room—a cozy luxury in a time when lesser members of households were sleeping communally on rush mats.
Chests were still the most important piece of furniture, but as people kept making adjustments for more and better comfort, settles developed. As the bottom, chest-like portion was eliminated for more complicated legs and stretchers, fabric was used decoratively to drape down over the front—most likely for decorative purposes, but also for blocking feet from drafts.
It was where chairs were concerned that upholsterers firmly ensconced themselves in furniture-making, becoming a legitimate (although, still expensive) industry. An Elizabethan development, the Farthingale chair (or back stool), was created without arms to accommodate large skirts, and its small, square back and seat were covered with leather stretched across it, trimmed in nailheads—permanent upholstery, for the first time!—rather than outfitted with a loose cushion. Upholsterers became more involved in creating chairs with permanent coverings, although simple, loose “squab” cushions were still predominant. The back stool came to be known as “an upholsterers’ chair,”—but comfort as we know it today was still a long way’s off.
Elizabethan coverings included: leather, brocade or colored cloth embroidered with silk, and velvet trimmed in heavy fringe.
Jacobean Furniture: Upholstery’s Beginnings

An upholstered Jacobean chair.
The first fully upholstered sofa, The Knole Settee.
In the 17th century, carpets were heavily imported from Turkey to Europe, but for the most part, European craftsmen were handling them without much care, cutting rugs up for use as seat cushions. It became popular to imitate Turkish carpets, a practice of drawing strands of wool through a linen backing, which came to be called “turkey work.”The most popular upholstery option, turkey-work was colorful, brightly patterned, and more or less a synonym for Baroque style.
But upholstery still was not a part of the general repertoire, and this has a lot to do with the overall attitude of the times. Upholstered chairs seem obvious today, but back then the connotation took awhile to catch on. “In early days the chair was a seat of honour; there would probably be only one in even a large hall, and a man using it would not look specifically to find comfort in it.”1 But a hesitancy toward upholstery goes even further than that. “Anything in the way of comfort was regarded with a certain feeling of contempt and was felt to be effeminate. Shakespeare, in his Richard III, makes Buckingham say, “This prince in not an Edward! He is not lolling on a lewd day-bed.”2 But James I was a bit more effeminate himself, and men in general dropped their “Spartan-like outlook”—and the upholstered chair got its footing.
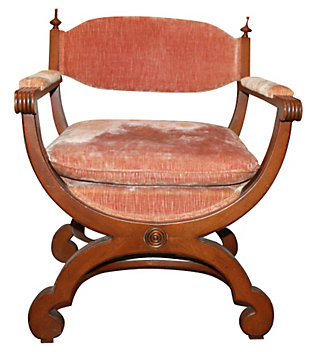
Jacobean furniture itself stayed in the same vein as Elizabethan, with a few adjustments along the way. Things were still made from oak, and were still blocky in nature due to those making it: carpenters with carpenter’s tools, and carpenter’s skills. But the first stuffed seats are seen on revival-style, X-frame chairs (pictured). In England, the “Upholder’s Guild” was the basis for the name “upholsterer,” a booming industry that brought about the coffer-maker’s chair, luxurious bed hangings, and cushions filled with down, feather and hair.

Renaissance Spain: Moorish Influence
Tooled leather typical of Renaissance-era Spanish chairs.
Leather was pretty well established as a common chair covering, but the tooled leather upholstery in Spain during the Renaissance was the most magnificent. Also in Renaissance Spain, gorgeous colorful tapestries and other exotic materials covered fraileros, simple chairs that were known for their multitude of coverings, as well as Turkish divans—low sofas completely covered in stuffed cushions—that were carry-overs from the Moors’ Middle Eastern roots. The biggest piece of the puzzle, however, is in beautiful, taut decorative leather covering and the dark wood frames—a moody combination that would come to always impart an exotic, Mediterranean feel.

The Walnut Period: Refining Comfort & The Rise of Textile Factories in Europe
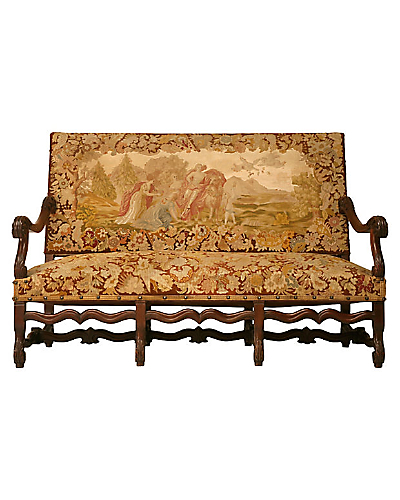
A tapestry-covered Louis XIII-style settee.
A needlepoint-covered French settee in the late Rococo style.

Needlepointed upholstery and fringed trim wrap around the frame of a Baroque-style armchair.

Example of a loose cushion on a wooden chair, still used for extra comfort on caned seats.
The Walnut Period itself was a big deal for design in England: King Charles’ foreign tastes shook things up, followed by King William’s being an actual foreigner. England welcoming the Protestant refugees in the 1660s meant that the renowned Flemish weavers known for their magnificent tapestries were settling in Britain, helping to establish the famous Mortlake Tapestry Factory in London as one of the finest in Europe. In France, underLouis XIV, the Gobelins Factory was created just outside of Paris, making spectacular tapestries and fabrics for use in upholstery, as well as furniture that lined the halls of the royal palaces. Naturally, when the Huguenots were forced to flee France, finding protection in England and the Netherlands, the textile and upholstery industries in these countries flourished, with the help of these talented refugees.
With Charles II on the throne, the Puritan regime ended, and the decorative arts flourished again in England. People were back to seeking comfort, and yearning for furniture for every occasion. Whereas chests once served a ton of different purposes, there were now tables for everything, china cabinets, buffets, cupboards, daybeds, and chairs specifically for relaxation. In 1705, during Charles II’s reign, we see the first fully upholstered armchairCaned seats (and, less expensive, rush seats) completely dominated the scene, adding extra comfort and give to seats and chair backs that wood could not provide. The popularity of the daybed was redefining relaxation, offering a clearer distinction between the bedroom and the living room. And custom cushions accompanied almost everything.
Upholstery finally took over as the most popular treatment during William’s transitional style of furniture: William & Mary-style high-backed chairs were upholstered, and the winged easy chairs (and “sleeping chayres”) also boasted all-over upholstery.
Chairs began to more closely resemble what we know today. The Huguenot craftsmen in England made Queen Mary gorgeous silk for ornate upholstery. During the Queen Anne periodupholstery was used much more often: silk damask, wool moreen, often including elaborate embroidery, needlework, crewelwork, and Turkey work. Cushions were horsehair, with linen lining, and down for suspension.
Beds were one of the most upholstered items in the house: William & Mary-style bedsteads and later, Queen Anne bedsteads, were totally covered in soft fabric, like velvet. The only catch to this cozy enclave? These coverings couldn’t just be taken off and washed; entire beds had to be stripped to the frame, then reupholstered.
Early American Luxury: Upholstery in the Colonies
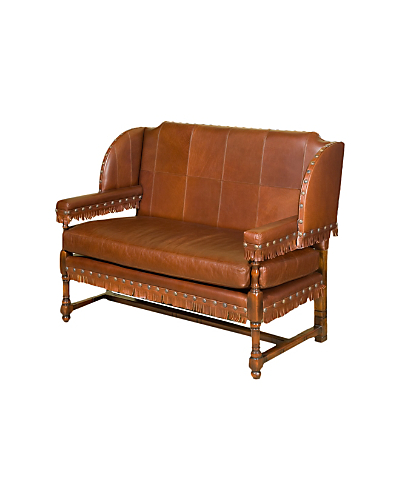
The Pilgrims had a different set of challenges to contend with, but those who could afford to import fine fabrics stayed pretty well on track with the trends back in Europe: turkeywork, needlework, leather, or caned seating. The Cromwell settee, based off the general design of the Cromwellian chair, was itself a luxury in Colonial homes, and common ground for fine covering. More often than not, Colonial homes reverted back to basics, but where time and energy allowed, it was their own wives and children who contributed needlework to upholstery.
Mahogany Period Furniture: The Age of the Designer & the Drop-In Style Seat Cushion

A Victorian side chair with a drop-in cushioned seat.
A fully upholstered mahogany Chippendale-style daybed.
The soft palette of the Neoclassical era on an American Federal-style settee.
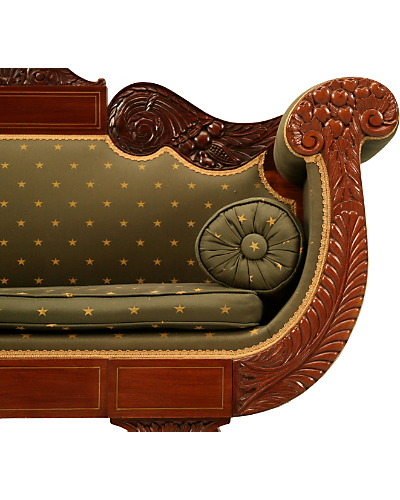
Regal upholstery on an Empire-style sofa, with round bolster pillows on either end.
During the Age of the Designer, upholstery was very much integrated into the furniture-making process, and, other than paint, was the primary way designers could implement the going styles. Choosing what colors and fabrics to use in-house set the trends and upholstered furniture dictated the color palettes of the era.
Comfort improved (and upholsterers became integral parts of the chair-making process) with the innovation of the drop-in seat. After being constructed, the chair’s seat is left open, fastenings and supports are built, and then the stuffed and upholstered seat is fixed inside the frame. Drop-in seats weren’t exclusive, however: the “stuff-over” method was also popular, with fabric covering the seat and the seat rail.
Architect and tastemaker Robert Adam’s Neoclassical chairs were clad in bright pastels, complementing his Palladian-style interiors—and so did Louis XVI’s chairs, in soft blues, pinks, and yellows. Thomas Chippendale’s camelback sofas were some of the first to be completely upholstered, except for exposed legs. Chinoiserie silks were used to complement his designs in “the Chinese taste,” some of his most iconic designs. Overall, upholstery was winning out over the elaborate carving of the Rococo period.
George Hepplewhite‘s book The Cabinet-maker and Upholsterer’s Guide, similarly, offered guidance in interior design, color palettes, and how to arrange a room. His seats were wonderfully overstuffed, finished with brass nailheads, and covered in delicately colored haircloths and silk. Overlapping with Hepplewhite’s style, with a few differences, Thomas Sheraton published the Cabinet Maker’s & Upholsterer’s Drawing Book (1791), and his chairs favored the same soft color palettes, and utilized horsehair stuffing.
The Neoclassical era was followed up by the Empire and Regency styles, bold revival styles that used rich jewel toned upholstery like velvet, perfect for offsetting the luxurious treatment of the frames: gilded, painted, or black lacquer. The iconic cornucopia-armed sofas of the period almost always featured matching, upholstered round cushions on either end.
Advancements of the 19th Century
Victorian Opulence: Perfecting the Steel Coil Spring
A tufted leather Chesterfield sofa.
All-over button tufting seen on a Belter laminated settee.
Modern upholstery would drop its associations with certain areas or groups of people, thanks to two major innovations that changed the upholstery industry immensely: the invention of thesteam-powered engine, which provided cheap power to machine looms for the mass-production of machine-woven fabrics, and the steel coil spring, which changed comfort forever. Upholstery also began to be more at the discretion of the buyer: with wide availability of fabrics and more individual shops opening up, there was more variation. Hepplewhite style, for example, was famously clad in soft, more delicate colors, and households followed suit. Modern upholstery was more for breaking the rules, and expressing personal style.
Inner springs inside seat cushions were revolutionary—the problem of stuffing shifting around or only lightly deflect the hard wood underneath was solved. Springs added an incredible lightness and resilience to seating. Add the heavy tufts and overstuffed look of sofas and settees to the spring coil construction, and you had furniture built for lounging.
An unusual hiccup in the progression of upholstery was the sideline Arts & Crafts style, a clean, simple approach to making furniture that caught on in America, and went hand-in-hand with the rustic Mission style. The philosophy was all about a return to a more “honest” way of doing things: carpentry, solid jointing techniques, sturdy oak, and minimal embellishment. Furniture-makers likeWilliam Morris and the Stickley Brothers favored medieval-style nailhead trimmed leather and Baroque tapestry. 
But Victorian style was all about lush comfort, dubbed the Age of the Upholsterer: shiny silks and brocades, velvet, and leather all got the button-tufted treatment, not to be outdone by the incredible carving of their Rococo Revival frames, most notably by John Henry Belter. A simpler upholstery was also popular—cross-stitch embroidery on canvas or wool that women could make at home—but more often, fringes and tassels were used, without much reserve.
Modern Materials
Modern wool seat cover from Knoll Associates on a Harry Bertoia Diamond chair, 1952.
More futuristic materials weren’t far off, with streamlined styles like the Bauhausschool of design and the radiant metallics of Art Deco style. In 1935,nylon was invented at the DuPont research facility in Wilmington, DE. This silky fabric, used across a multitude of applications from toothbrushes to pantyhose, became a synthetic substitute for silk when World War II led to its scarcity. It proved to be durable, resilient, resistant to the elements that led to the wear and tear of traditional upholstery (like pests, rot, etc.), and was very affordable.
With new furniture shapes made possible by the use of bent steel, molded fiberglass, plywood and molded foam cores, upholstery was again revolutionized, taking on the textures and colors of a new era—one of sleek, modular, modern design. Famous design house Knoll Associates, which counted among its designers some of the most famous names in Mid-Century Modern design, created a number of iconic custom textiles that are still used today.
1. [Hayward, Charles H. English Period Furniture. 1959. Charles Scribner's Sons, New York, NY. pg 54.]